Network Topology and Raspberry Pi Configuration
This page outlines how to reconfigure the raspberry Pi to use an external network instead of its own.
A better network connection topology is having all the machines working together connected over the same network. The Clover's Pi originally is setup to provide its own network through the access point mode therefore it must be reconfigured to connect to the wifi router and communicate with the other machines such as the motion capture system computer. This reconfiguration process can be found on the Clover website where the steps are repeated here:
Disable the
dnsmasqservice.Enable DHCP client on the wireless interface to obtain IP address. In order to do this, remove the following lines from the
etc/dhcpcd.conffile:Configure
wpa_supplicantto connect to an existing access point. Change your/etc/wpa_supplicant/wpa_supplicant.confto contain the following:where
SSIDis the name of the network, andpasswordis its password.Restart the
dhcpcdservice.
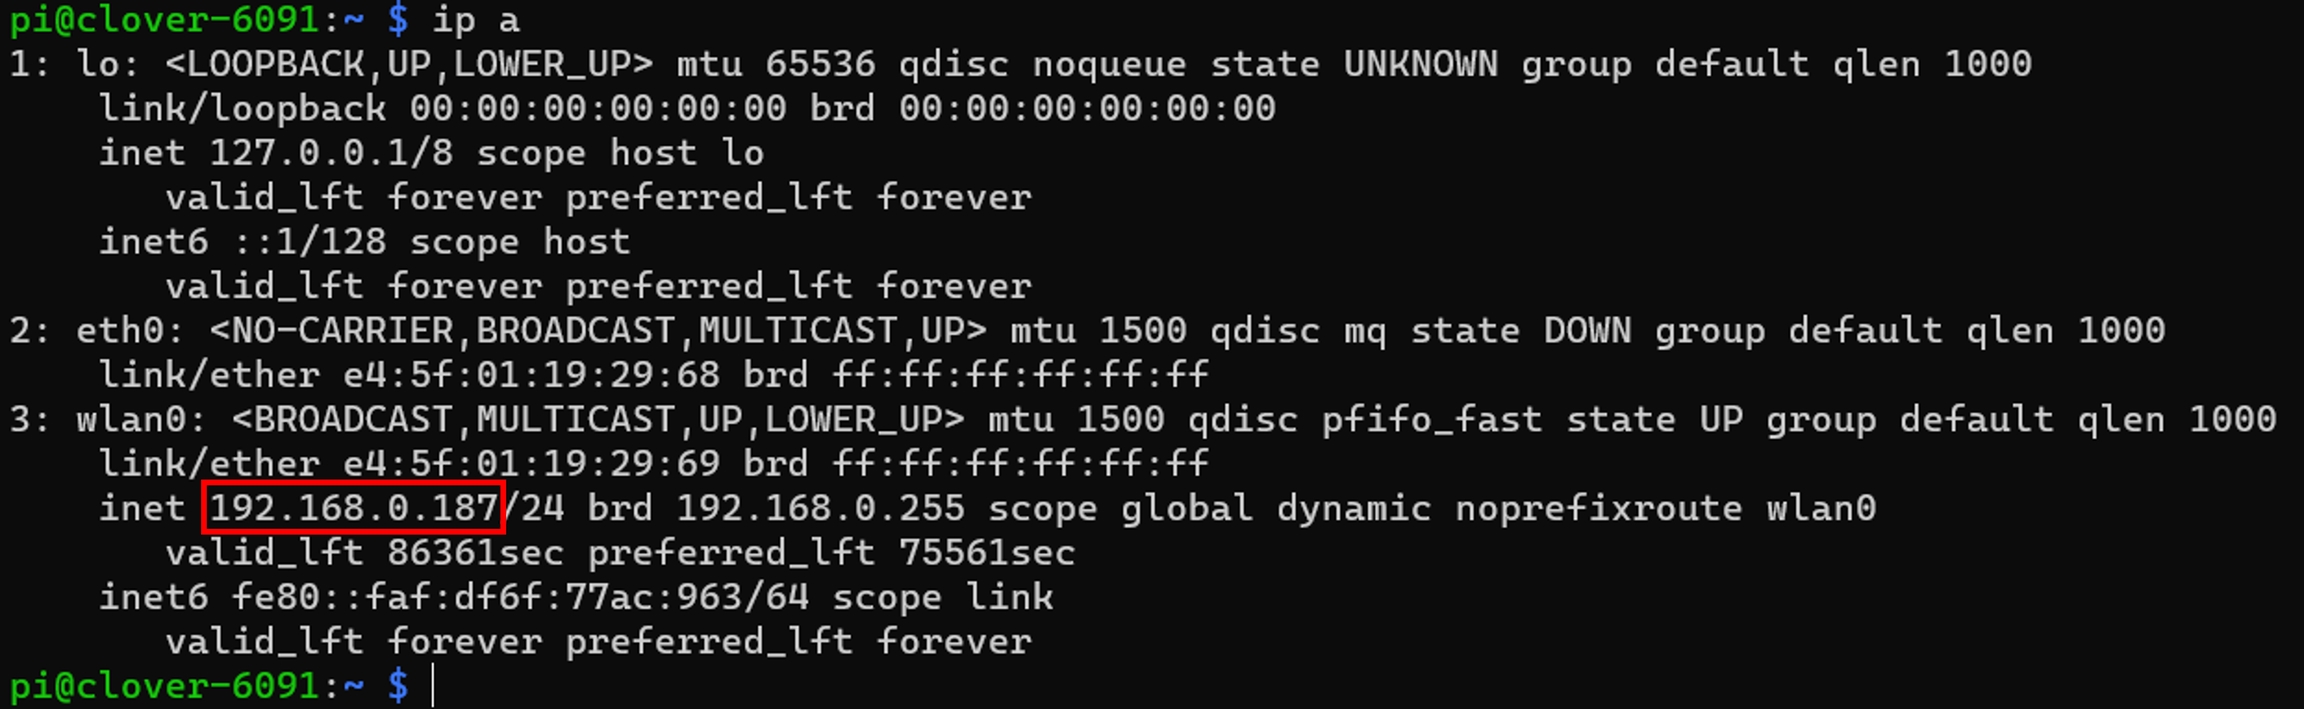
To configure the wpa_supplicant.conf file use sudo for permission. Also, the permanently set static IP address of the Pi has been turned off so in order to ssh connect to the Pi. You need the one assigned when it is connected to the wifi router. This can be found by connecting the Pi to a monitor, and using a keyboard login with:
Username: pi
Password: raspberry
Then type:
You'll get a screen like the following figure with the highlighted IP.
Last updated